Monday, November 16, 2015

Scrumptious Carrot Cake


carrot cake cut in individual portions
Carrot Cake cut into individual servings

Spiced Carrot Cake with Cream Cheese Frosting

This spiced cake is an ideal treat for the cooling Fall weather and it is an easy prep recipe. Pre-shred carrots and separate them for the recipe ahead of time and you cut the cooking and preparation time in half.

Pair the cake with cream cheese and butter frosting and you have a new family favorite!

Carrot cake is a great way to use up a huge batch of carrots. 

The ingredients are listed below along with the cake directions. I used a frosting recipe from Allrecipes.com and will include the link below. (That frosting is the best one I have ever tasted or made. I will use no other from here on in and... it only has four ingredients. Wow!)

Carrots are a great source of vitamins and minerals and contain high amounts of beta carotene. Utilizing this sweet, orange root in recipes is a smart way to add a healthy touch to our diets. They are good sources of potassium, fiber and vitamin C which is great for our bodies. The Clemson Extension Service has a similar recipe and other ideas for using carrots. Download it for free here >PDF<

I pre-shredded my carrots in a food processor a few days before I made this cake. Having them on the shelf and ready to go helped save me clean up time and preparation hassles. Bag them in increments for the amount of batter to be created. Check the lower half of the page for a printout of the recipe. The recipe makes one 9" by 9" cake or about 18 small cupcake sized muffins


Scrumptious Carrot Cake

Carrot cake muffins

Bake smaller portions as
carrot cake muffins
Shopping list:


2-3 pounds of carrots
Eggs 
Flour
Sugar
Baking Soda
Oil
Ground Cinnamon
Salt
Powdered Sugar
Cream Cheese
Butter
Vanilla
*Pecans
*Ground Nutmeg
*Ground Ginger

Recipe 

Ingredients:

1 1/2 cups shredded carrots
2 eggs
1 cup sugar
1/2 cup oil
1 cup flour
1 teaspoon baking soda
1/2 teaspoon salt
1 1/2 teaspoons ground cinnamon

*Optional additions:

  • 1/8 teaspoon ground nutmeg
  • 1/8 teaspoon ground ginger
  • 1/2 teaspoon vanilla
  • 1/4 cup chopped pecans


Placing a cake on a cooling rack helps
prevent cake center from falling and
allows the icing stick to the top layer.

Instructions:

Whip eggs until blended well. Slowly add oil and sugar until well mixed. Add salt, flour, and baking soda. Stir in cinnamon and other optional spices. Drop in carrot shreds and coat well. Bake in greased 9" x 9" pan at 350 degrees for about 25 to 30 minutes depending on your oven and altitude. Cake will be done when a toothpick inserted comes out clean. Let cool on cooling rack then remove carefully from baking dish. Frost with cream cheese frosting and store cake in cool place or refrigerate unused portions.

For Muffins

Lightly grease muffin pan surface. Drop in cupcake papers. Fill with two tablespoons of batter and bake for about 20 minutes at 350 degrees. Let cool on rack before frosting.

Frosting recipe


Cream cheese frosting and hand blender
- Fun Stuff! Want one of the beaters for tasting?
Small Batch Cream Cheese Frosting 

Recipe

Ingredients:

1 - 8 oz package of cream cheese - room temperature
1/4 cup of butter - room temperature
1 cup powdered sugar - finely sifted
1/2 teaspoon vanilla

Instructions:

Combine and cream together cream cheese and butter until light and fluffy. Add vanilla. Slowly incorporate powdered sugar. Store excess frosting in refrigerator.


Enjoy!


Print It!

Click on image and right click mouse for printable copy

Scrumptious Carrot Cake Recipe Page


Tools, equipment, and gadgets used in this recipe
Shop Amazon
(affiliate links)


Food Processor


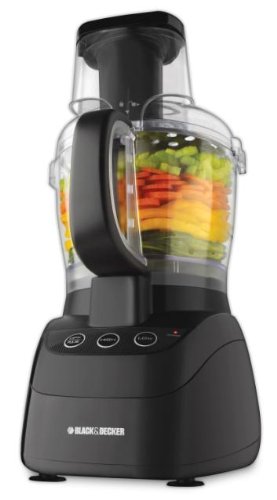
The Black & Decker FP2500B PowerPro Wide-Mouth 10-Cup Food Processor
is perfect for shredding carrots and mixing 


Cooling Racks
   

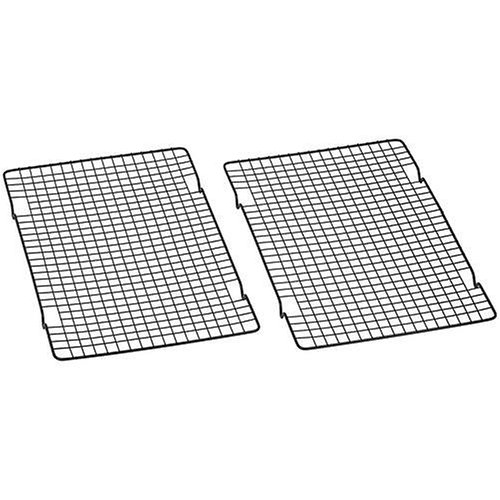
Baker's Secret 1061483 10-by-16-Inch Nonstick Cooling Rack, Set of 2


Hand Mixer


Hamilton Beach 62682RZ Hand Mixer with Snap-On Case


Thank you for dropping in today. May your baking days be pleasant and all your cakes be successful! 

Add your comment below and let me know you were here!


Monday, October 12, 2015

Pomegranate Jelly - Making This Delicious Preserve the Hard Way

Pomegranates - we love them. The sweet seeds are the best taste shy of fresh berries and each summer we watch our tree (or the neighbor's) for signs they are ripening. 


A Pomegranate is ready once the skin cracks and the berries are visible. Watch for birds, as they will tell you the fruit is ready by zoning in on the fruiting bush. 

red pomegranates in a strainer being lifted by a hand.
Ripe Pomegranate Fruits
If the fruit is not protected by a cloth covering while it is waiting to ripen, a few flying creatures may just make off with the juicy seeds. Cheesecloth, old panty hose, or a slipcover of burlap may protect fruit from the bandit birds. 

I collected a few of these delectable fruits while visiting my aunt, recently, and I had it in my mind that I was going to turn them into jelly. Little did I know how much work this would entail. Getting to those seeds is time consuming! I was always assigned Pomegranate duty when I was a youngster. We used them in a special salad and in various other recipes when I was growing up. 

First, I had to crack open this crazy fruit to get to the tangy seeds. 

Peeling Pomegranates
My first order of business was to peel the dozens of seeds out of the shell of the Pomegranate itself. Mind you, I had eight or nine of these to work with. I thought I might have enough for a good batch of jam. 

several containers with various stages of pomegranates - whole fruit, seeds, and discarded skins
Seeding Pomegranates for cooking and jelly
Considering I did not want to stain my hands with pink fruity colors I decided to just cut the fruit in half. The dilemma I faced was not doing this as soon as I brought these home. At this stage, the fruit is like old leather. If the fruit is peeled within a couple of days of picking, the covering is still soft and pliable. Imagine trying to cut through thin pieces of wood. I used a steak knife to slice the pomegranates in half, then painfully picked out the seeds and tissue that accompanies the juicy morsels. 

Once the fruit is opened, a red coloring indicates ripeness. I did have to discard three of my fruits as you can see in the image. They were not quite ready. A cracked skin is always indicative of a ripe pomegranate. Stick to this rule every time and always have a ripe Pom.

Extracting Juice from the Seeds
By the time I had peeled the six ripe fruits I had about 4 cups of seeds. The seeds were checked for peelings and off colored, shriveled portions and put into a sauce pan to simmer on a medium low setting. Once I heard a sizzling sound, I took a potato masher to the seeds and crushed the seeds a bit to release some of the juice contained inside. I repeated this over the course of about twenty minutes.

When the seeds were heated through I put the whole batch into a blender and ground everything to a thick puree.

Ecko Measuring Cups
I tried a couple of methods of separating the juice from the pulp. Once way was to leave a funnel in the top of the blender with a coffee filter in the cone area. The pulp just slid to the edge and over. This was too messy, I decided. I, then, took a cutting of cheesecloth and cut a square 10" by 10". I put the cloth into a strainer and set the strainer over a sauce pan. This allowed the juice to drip through the cloth into the recovery pan. To speed this up, carefully, twist the top corners together, capturing all of the pulp in the cloth and slowly squeeze the mash until the juice no longer runs out. Use care as the mash will be hot. Let it cool a bit before handling. These six pomegranates netted a little over 1 1/3 of a cup of juice.

Making Pomegranate Jelly
The recipe in the Ball Blue Book of Preserving requires 3 1/2 cups of juice for a batch of jelly. I did not have that many pomegranates. To do so would take at least twenty ripened fruits. The time for that project would be at least three hours from peeling to canning stage.
The Ball Blue Book of Preserving
Pomegranate Jelly Recipe

For this recipe and a general rule of thumb for fruit jelly using juice. Match the amount of juice to the same amount of sugar. The sugar often will gel if simmered long enough on a medium heat.

Ingredients:

1 1/3 C Pomegranate Juice
1 1/3 Sugar
1/2 Package of Instant Pectin (freezer jam package)

Simmer juice and sugar over medium heat until at a full rolling boil. Let boil about 7 minutes then add pectin. Stir well and let boil another 3 minutes. Pour into plastic container and use soon or freeze for up to six months. Makes: 1 cup of  jelly


My best advice for making this preserve?

# 1 - USE A JUICER!

The work of removing all those seeds is alleviated using one of these handy juice extractors. The pulp and mess are combined for easy disposal while the delicious juice drains out, clean, clear, and free of headaches!

Juice Extractor


And # 2?

Learn how to peel and deseed a pomegranate the right way! This video demonstrates an easy to process pomegranate. The fruit may also be peeled in a bowl of water for reduction of squirting, juicy seeds! Don't do this the hard way like I did!


Pomegranates are a delicious and cheery fruit in summertime heat. Our family used to have a great time eating them fresh, but even better time enjoying this wonderful preserve. Don't do this the hard way like I did. Take the time to do this right and either buy the juice already squeezed or juice it through an extractor. Enjoy!

Your comments or suggestions always welcome

Thank you for visiting!


Monday, September 14, 2015

Bravo Banana Bread - You are Almost the Perfect Food

banana bread in open zip lock bag
Bravo Banana Bread

Banana bread contains the most vital nutrients of the human diet. It has,  at the very least, four of the major food groups within it.


Carbohydrates, proteins, fruit, and fats make this delicious bread a great choice for a decent breakfast or snack item. Use butter instead of oil and it is only missing a portion of vegetables, which to me makes it almost the perfect food.


Like many of the folks I know that do a bit of baking, I save bananas. I save a LOT of bananas. They start to get a few spots of brown on them and into the freezer they go. They keep long term well and are easily reused in this banana bread recipe. I bake quite a bit of it during the cooler months around holiday season. 

If you are freezing bananas, be sure to rotate your stock about every 60 days. Always store the freshest portions last and the oldest first for first in first out usage. Bananas may be frozen skin on or put in freezer bags. Pack three bananas per bag and simply remove the amount you need for the recipe. 

Banana bread may be baked ahead of time and frozen. It may be thawed, warmed, and sliced for serving. The bread keeps for about 3 months. 

Banana bread requires only three medium sized bananas. A frozen set or a few fresh ones will meet the necessity. The rest of the ingredients are standard kitchen staples such as flour, salt, and baking powder. You should already have most of these in your cabinet. Always check expiration dates on stored goods. Even dry goods have a best use by date on the package. 

bananas, butter, eggs, baking powder, baking soda, flour, sugar, salt - baking ingredients
Baking basics


Shopping List:

  • Bananas (6)
  • Flour
  • Baking Soda
  • Baking Powder
  • Oil shortening, or Butter
  • Salt
  • Sugar
  • Eggs

Makes: 2 loaves
Servings: About 20

Recipe

  • 3 1/2 C Flour
  • 1/2 t salt
  • 2/3 c oil, shortening, or butter (I use butter)
  • 1 1/3 c sugar
  • 4 eggs (beaten)
  • 6 ripe bananas - mashed
Optional ingredients:
  • 1/4 c pecans or walnuts
Instructions

Preheat oven to 350 degrees. 

loaf pan with batter ready to go in oven
Banana bread pre-baked

Sift flour, baking soda, baking powder, and salt. Add the oil (or butter or shortening) and combine until ingredients are thoroughly mixed. Add sugar slowly. Stir in eggs until dry ingredients are mixed in well. Add bananas. Stir until batter is smooth in texture. Some banana lumps are fine. It gives the bread character. 

Grease two bread pans and set them in the oven for about a minute and a half to heat up. Handle carefully! The batter should sizzle when poured into the pans. This adds a nice crust to the bottom if the bread and helps it lift easily out of the pan.

Bake for about 40 minutes to 1 hour. 

Check bread at about 35 minutes to test. Slide a butter knife into center. If it comes out with batter on it, bake an additional 15 minutes. Cover bread with foil after it has browned on top. It will generally brown before it is done. 

Remove from oven and let cool. 

Remove from pan by running a bread knife along sides and tip bread out. It should drop out easily when cooled if pan has been properly oiled. 

**A great tip a friend shared with me is sprinkling cinnamon sugar on the interior of the greased loaf pan. This gives a nice sweetness to the bread. 


To cut baking time, consider baking banana bread as handy muffins or individual loaves. 


Banana Bread Muffins

Coat muffin pan with oil or nonstick spray. Place muffin papers. Spoon mixture into muffin papers and bake about 30 to 40 minutes or until toothpick comes out clean.


Individual Loaves

Coat small loaf pans with oil and bake about 40 minutes at 350 degrees.

All these goodies may be served as soon as cool enough to cut.

Enjoy!


(For a free list of baking goods check out our sister site Survival Recovery and learn why baking ingredients should be your first foods in food storage)


All images and content are property of M Burgess. Please, do not copy. Copyright 2015.

Wednesday, September 9, 2015

Easy to Make Apple Butter in a Crock Pot

Apple butter is a favorite preserve for those who know of its tangy, sweet flavor. It is easily created at home in a crock pot with just a few simple ingredients and a bit of time.

crock pot image with a container of apple butter
Homemade Apple Butter

This recipe is a great way to use up an abundance of apples. The delightful mixture may be preserved in jars or freezer for long term storage.

If you have never tasted this great apple spread, follow the instructions below and introduce yourself to a new pancake or waffle topping! Apple Butter works well as a healthy substitute for maple syrup. (This author even uses it as a secret ingredient in baking items.) There are many uses for Apple Butter like basting a baked ham or chicken for an added touch of sweetness and spice. It is simply a spiced apple sauce
Shopping List
  • 8 Medium Granny Smith Apples
  • Butter&nbsp;
  • Brown Sugar
  • Cinnamon
  • Nutmeg
  • Ground Cloves
  • Ground Ginger

Recipe
Prep Time:&nbsp;20 minutes
Cooking time:&nbsp;2 hours


  • 8 Granny Smith Apples
  • 2 T Butter
  • 1/4 C Brown Sugar
  • 1 t Cinnamon
  • 1/2 t Nutmeg
  • 1/2 t Cloves
  • 1/4 t Ground Ginger


spiced apples in a blue and white crock pot
Sliced apples coated with spice mixture
Instructions

Preheat crock pot on low setting.&nbsp;
Add&nbsp;butter&nbsp;and brown sugar to&nbsp;the crock.
Peel and core apples, remove skin if desired. (Skins may be kept on apples if a hand blender or stand-up blender model is used when Apple butter is ready to cool. Blend until smooth. This adds extra fiber, pulp, and vitamins!)&nbsp;
Drop apple slices into crock pot.&nbsp;
Add the final ingredients to the apples and stir the slices around in the mixture to coat well.&nbsp;
Cover and let steep for two hours. the apple mixture will literally melt down and only require a stirring action to convert it to Apple butter.&nbsp;
Let cool and enjoy!&nbsp;
*Makes about 2 1/2 quarts

How To Preserve Apple Butter

Canning
Apple butter while still hot may be transferred to a large pot and simmered for an extra 30 minutes to remove impurities and brought up to temperature for canning. Scoop foam off of mixture if needed and pour into hot, sterilized, and approved canning jars. Top with new, hot lids and rings with a 1/2" headspace clearance. Place filled, hot jars in water bath canner. Process pints for 15 minutes and quarts at 20 minutes. Turn heat off when time is expired. Allow canner to cool slightly. Remove the lid away from the body to prevent steam burns. Place jars on a surface covered with a double layer of towels. Let jars sit undisturbed and covered with a cloth for 24 hours. Label the tops with the date made and keep in a cool, dark place for up to two years. Turn jars in deep storage occasionally to keep contents fresh. Refrigerate after opening and use within two weeks.&nbsp;
Freezer Storage
Allow Apple Butter mixture to cool down to a manageable temperature. Using freezer bags, pack cooled mixture into bags leaving about a two inch head space in the bag. Lay bag flat and let cool to room temperature. Keeps in freezer for about 6 months.


posted from Bloggeroid

Sunday, August 2, 2015

Late Summer is Strawberry Season

strawberry blossoms and leaves with berries developing
Strawberry in Triplicate

Preserving Strawberry Fruits

Strawberries appear once again in the corners of the garden and bargain pricing in supermarkets. The warmer seasons produce a wealth of berries. Preserving these sweet, delicate fruits is a simple process whether in jams, jellies, freezer bags, or dehydrated form. 


Canning Strawberry Jam

The strawberry is one of the fruits most people use to start canning projects. These preserves help develop a sense of the process and its requirements. The steps are fairly straightforward. Sterilize equipment, prepare fruit and jars properly, and use the right ingredients. The skills learned from making strawberry jam will migrate into other canning projects. The base instructions are the same. 

Best results require that quality fruits be used in these projects. Firm, sweet berries result in a top quality product. 

Gather all ingredients needed before starting up the processing. Add water to the water bath canner and set the heat on medium so that the water is at the right temperature when the jam mixture is finally ready to go in the jars. When all items are set in place, the ingredients measured and ready, the equipment is gathered and clean, the act of canning jam is a fun and simple project.

If the jam does not set for one reason or another, use it as a syrup. The firmer jams tend to tear bread, but the thinner confection spreads easily and tastes just as good! Use it on pancakes or french toast, in smoothies and shakes, slushes, or as flavoring in baked goods. 

Basic Strawberry Jam Recipe
5 cups mashed berries
7 cups sugar
1 box pectin
1/4 c lemon juice
1 T butter

Instructions in video:

The video below was produced several years ago by this author. It will be refilmed eventually... Enjoy!

Strawberry Jam Instruction Video


Freezing Strawberries

frozen berry blocks in saucepan
The colorful ice blocks are blended berry mixes. 
Whole berries should be washed, stemmed, and checked for blemishes. Use a small spoon to remove the stem piece. This will help conserve fruit material. Let washed berries dry for a short time to eliminate excess moisture. Place on a rack or blot dry on a towel. The dryer the berry, the better it will freeze. Water droplets attract frost in the freezer compartment and cause freezer burn. Berries keep for up to a year frozen.


Strawberries are often frozen whole or sliced in form, but running them through a blender can also be a great freezing method. The ice blocks pictured were frozen in plastics and placed into ziplocks when solid. These organize easier than the whole berry bags do. One might consider adding a bit of fruit preserver or a bit of lemon juice. One teaspoon per cup should work fine, but it is not needed. These blocks may be melted down later and used in jams, slushes, and smoothies or additional creative food dishes. These may also be eaten as is...

Dehydrating Strawberries

Wash berries and remove stems as suggested in the freezing section above. A standard dehydrator will take three 3 to four hours to dry fruit. Slice fruits in quarters and place on dehydrator rack. An oven set on 200 degrees may also be used. Place fruit on baking sheet and check occasionally for progress. Let cool when ready and keep in cool, dark place. Freeze if desired to preserve fruit long term. The dried berries may be used in cereals, eaten as is or rehydrated later for baking.

For more food storage tips visit:

 Survival Recovery


Now that we have jam it is time to bake some great bread


All content and images property of M Burgess except where indicated. 
All rights reserved 2015